
There’s something irresistibly comforting about biting into a hot, golden & crunchy aloo tikki — golden brown on the outside, soft and spiced on the inside. This humble Indian street food has found its place in homes, festivals, and global menus. In this blog post, we’ll dive deep into the authentic aloo tikki recipe, complete with tips for perfect crispiness, variations, and how to serve it like a pro.
What is Aloo Tikki?
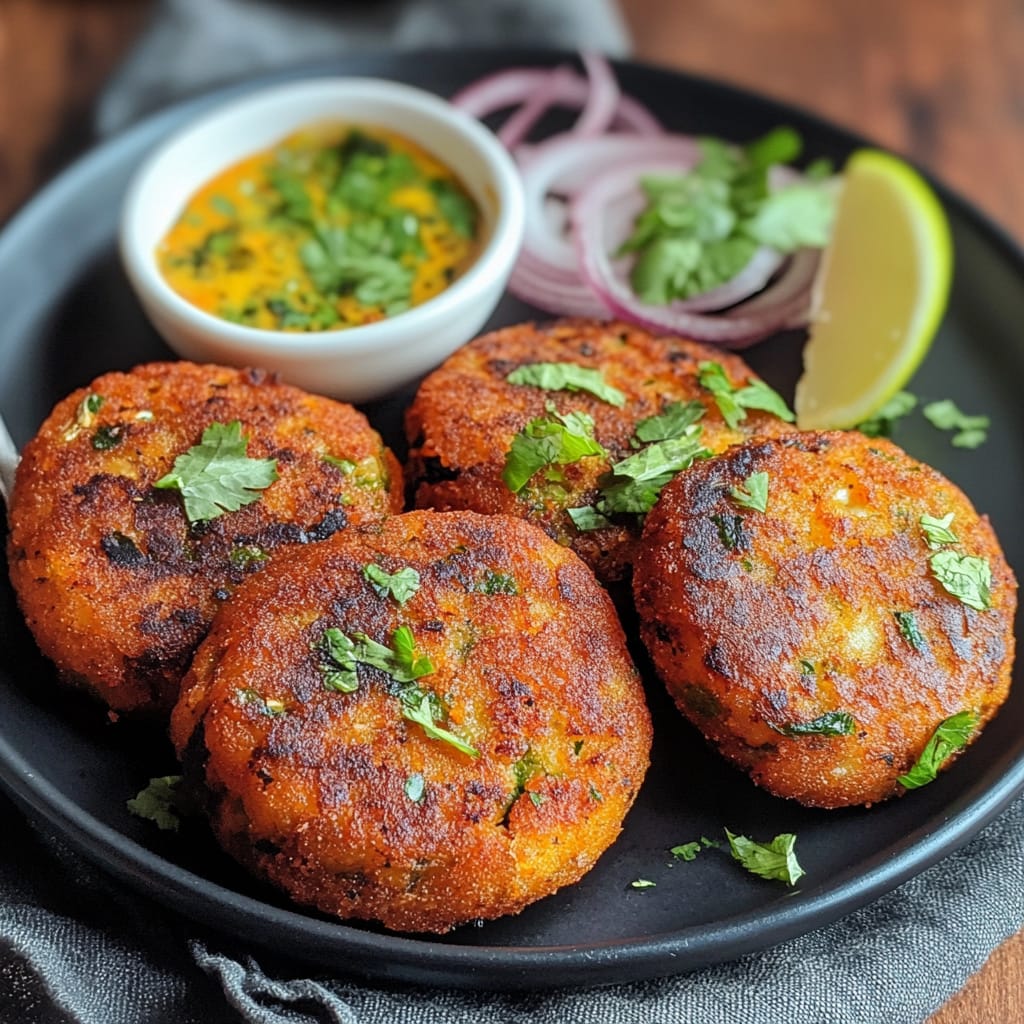
Aloo Tikki is a popular North Indian snack made from boiled potatoes (aloo), aromatic spices, and herbs, shaped into patties and shallow-fried or deep-fried until golden and crisp. The term “tikki” means a small cutlet or patty, and the dish is often served with chutneys or used as a base in chaats or burgers.
Why You’ll Love This Aloo Tikki Recipe
- Crispy texture with a soft, flavorful filling
- Customizable with peas, paneer, or lentils
- Vegan and gluten-free (with minor tweaks)
- Perfect for parties, snacks, or festive menus
- Pairs well with a variety of chutneys and toppings
Whether you’re preparing a quick evening snack or planning an Indian-themed dinner, this crispy aloo tikki recipe is your go-to choice.
Ingredients
Ingredients for Crispy Aloo Tikki (To make about 8–10 medium tikkis):
For the Tikki Base:
- 4 large potatoes boiled and mashed
- 2 tbsp rice flour or cornflour for crispiness
- 1 tsp roasted cumin powder
- 1 tsp garam masala
- ½ tsp red chili powder adjust to taste
- 1 tsp chaat masala
- 1 green chili finely chopped (optional)
- 1 tbsp fresh coriander chopped
- Salt to taste
For the Stuffing (Optional):
- ½ cup green peas (boiled and mashed)
- ½ tsp cumin seeds
- 1 tsp oil
- ¼ tsp turmeric
- ½ tsp amchur dry mango powder
- Salt to taste
For Frying:
- Oil for shallow or deep frying
Instructions
Step-by-Step Method: How to Make Crispy Aloo Tikki
- Boil and Mash the Potatoes. Begin by washing and boiling the potatoes until soft (use a pressure cooker or pot). Once cooled, peel and mash them thoroughly to remove lumps. Avoid over-mashing, which can make the mixture sticky.
- Prepare the Filling (Optional) for a flavorful surprise inside your tikki.
- Heat 1 tsp oil in a pan.
- Add cumin seeds, let them crackle.
- Add boiled green peas, turmeric, amchur, and salt.
- Mash lightly and cook for 3–4 minutes. Let it cool.
- Mix the Potato Dough. To the mashed potatoes, add rice flour/cornflour, spices, chopped coriander, and salt. Mix well until it forms a dough-like consistency. If the mixture feels too moist, add a little more flour for binding.

- Shape the Tikkis
- Grease your hands with oil.
- Divide the potato dough into equal portions.
- Flatten each into a patty.
- If using stuffing, make a dent, fill with 1 tsp pea mixture, and seal well.
- Fry the Tikkis. Heat oil in a non-stick pan or tawa.
- Place tikkis in batches without overcrowding.
- Fry on medium heat until golden brown on both sides.
- Drain on paper towels.


Notes
- 1. Use rice flour or cornflour – These help achieve the golden crunch.
- 2. Dry potatoes completely – Excess moisture can make the tikki soggy.
- 3. Chill before frying – Refrigerating the patties for 15–20 minutes helps hold their shape and crisp better.
- 4. Don’t fry on high heat – Medium flame ensures even browning and crispiness.
- 5. Avoid over-mixing – Overworked potatoes may turn gummy due to starch release.
Serving Suggestions for Aloo Tikki
This aloo tikki recipe is wonderfully versatile. Here are some creative serving ideas:
With Chutneys:
Serve hot with green chutney (mint-coriander) and tamarind chutney. Sprinkle chaat masala on top for an extra zing.
Aloo Tikki Chaat:
Place tikkis on a plate, top with yogurt, chutneys, onions, tomatoes, sev, and coriander for a street-style chaat.
Aloo Tikki Burger:
Use it as a patty in a burger with lettuce, cheese, and sauces for a delicious fusion meal.
As a Side Dish:
Pair with dal, rice, or salad as a crunchy side dish.
Variations You Can Try
- Stuffed Paneer Tikki – Replace green peas with crumbled paneer, masala, and raisins.
- Spinach Aloo Tikki – Add chopped spinach for added nutrition and color.
- Sweet Potato Tikki – Use sweet potatoes instead of regular ones for a healthier twist.
- No-Stuffing Tikki – Keep it plain for a simple and quick version.
Healthier Aloo Tikki Options
Trying to cut back on oil? Here are a few alternatives:
Baked Aloo Tikki:
Preheat oven to 200°C (400°F), place tikkis on a baking tray lined with parchment, brush with oil, and bake for 20–25 minutes, flipping halfway.
Air-Fried Aloo Tikki:
Place in an air fryer at 180°C (350°F) for 15–18 minutes. Brush lightly with oil before air frying.
Pan-Grilled Tikki:
Use a cast iron skillet or grill pan with minimal oil to sear the patties on both sides.
Storing and Reheating Tips
- Make Ahead: Prepare the potato mixture or even shape the tikkis a day before. Refrigerate in an airtight box.
- Freezing: Freeze uncooked patties between parchment paper layers. Thaw before frying.
- Reheat: Reheat on a pan or in an oven to restore crispiness; avoid microwaving to prevent sogginess.
FAQs About Aloo Tikki Recipe
Why does my aloo tikki break while frying?
Too much moisture or lack of binding agents can cause breakage. Add more flour and avoid overstuffing.
Can I use breadcrumbs in the mixture?
Yes, breadcrumbs help absorb moisture and improve texture. Use in place of or along with rice flour.
How to make it gluten-free?
Use gluten-free flours like rice flour or arrowroot flour instead of all-purpose flour or bread crumbs.
Can I make it without onions and garlic?
Absolutely. This recipe is naturally onion- and garlic-free, making it perfect for vrat (fasting) days.
Final Thoughts: Make Every Bite Count!
This crispy aloo tikki recipe is a celebration of flavor, texture, and nostalgia. It’s a dish that brings back memories of bustling Indian streets, festive gatherings, and cozy evening snacks. With this easy step-by-step guide, you can recreate the magic in your own kitchen—whether you’re making a chaat platter for guests or simply treating yourself.
From crunchy exteriors to flavorful fillings, aloo tikki is a timeless delight that never fails to please. Give it your own twist, share it with loved ones, and enjoy the joy of cooking from scratch.
From my kitchen to your plate –– Enjoy your culinary creation!